Tutorials/Crop Automation
The Create mod can be used to automatically harvest and replant crops.
Linear Farm Automation

This design produces a very efficient farm that can be extended as far as desired in both length and width. This tutorial will create an automatic farm with 80 each of beets, potatoes, carrots, and wheat.
Layout

Begin by laying out a grid of four 9x9 squares placed end to end. In the center of each square, dig a 1-block hole and fill with water in order to irrigate the plants. Place a Slab in each hole and place a torch on top.
At one end of the grid, dig a hole four blocks deep, five blocks in width, and seven blocks in length.
Underground Rail Line

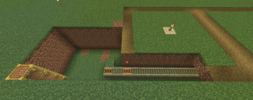
From inside the hole, dig a two block wide tunnel the along the right side of the grid for the full length. The right side of the tunnel should be level with the bottom of the hole and three blocks high. The left side of the tunnel should start one block above the bottom of the hole and be two blocks high. This forms a bench along the left side of the tunnel on which to run the rails. In the picture to the right, the top layer of dirt is removed from the beginning of the tunnel for illustration purposes only. You do not need to expose the tunnel.
Extend the rail bench two blocks into the hole. Place an unpowered Powered Rail at the end of the extension followed by a normal rail then a powered Powered Rail. Fill the rest of the tunnel with rails using Powered Rails and Redstone Torches approximately every 16 blocks. End the rail line with a Powered Rail abutting a solid block. This will cause the harvester contraption to return to the start point.

The Harvesting Contraption
Place a Cart Assembler on the unpowered Powered Rail with the arrow pointed towards the farm. Place a Switch on a block to the left of the Powered Rail. Stack four Linear Chassis on top of the Cart Assembler with the light colored sides facing forward and back. At ground level, place seven Linear Chassis in a line to the left of the tower and one to the right. Set the sticky range of all of the Linear Chassis to one by holding Ctrl while using a wrench on one of the Linear Chassis.

On the side of the chassis facing the farm, use a Slimeball to coat each of the Linear Chassis above ground level. Attach a Mechanical Harvester to each of the Linear Chassis at ground level. Attach a Chest or Barrel to the chassis above the Mechanical Harvesters.
Storage

Place a Portable Storage Interface on the left wall three blocks above the bottom of the hole and in line with the chassis. Place a Chute below the Portable Storage Interface and a Chest or Barrel below the Chute. For long term harvesting, you can replace the Chest with a larger Item Vault or route the produce to other automation using a Mechanical Belt.
Attach another Portable Storage Interface against the bottom Linear Chassis, facing the first Portable Storage Interface. Use Super Glue to attach this Portable Storage Interface rather than a Slimeball. The Super Glue does not react when clicking on a Linear Chassis. Instead, click on the Portable Storage Interface to start the gluing action, then click on the Cart Assembler to complete the action.

Activating the Contraption
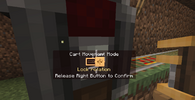
Right click and hold on the center part of either side of the Cart Assembler to bring up the setting menu. Slide the tab all the way to the right to select "Lock rotation". Place an empty cart in the Cart Assembler then use a switch placed either side of the Cart Assembler to activate the contraption. Use the Wrench on the cart to put the contraption in your inventory, then remove the Cart Assembler and Switch. Replace the Powered Rail which popped off with the Cart Assembler. Finally, place the contraption back on the first Powered Rail.

Setting a Timer
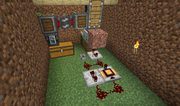
The timer requires one Switch, two Redstone Repeaters, one Pulse Repeater, and four Redstone Dusts. Place a Redstone Repeater facing into the block beneath the contraption's cart. Set this repeater to four ticks delay. Place a switch immediately to the left of the repeater. Place a Redstone Dust immediately in front of both the switch and repeater. Place a second repeater in front of either of the Redstone Dusts facing away from the mine cart. Set this to two tics delay. Place a Pulse Repeater next in front of the other Redstone Dust facing the cart. Set the delay to 5 minutes or as desired. Place two more Redstone Dusts in front of the Pulse Repeater and the second Redstone Repeater.
To start the clock, momentarily turn the switch on and back off. (Note a button generates too long of a pulse which interferes with the feedback loop.)

Finishing the Farm
Recover the open hole with dirt, slabs, or decorative blocks. Hoe and plant each of the 9x9 farm blocks. The farm is now fully operational and will run continuously until the timer is interrupted. If the storage gets full the contraption will continue harvesting the produce but leave it on the ground.